What is Realist Painting and what is the technique to obtain it?
Realist painting is a style of painting in which the technical accuracy and detail are such that the subjects portrayed look almost real. It differs from photographic style painting, which takes this realism to the extreme. However, in my opinion, the photographic style causes the loss of the typical charm of pictorial art.
Acclaimed, criticized, and now reassessed, this style developed according to the standards of the 19th-century Académie Français des Beaux-Arts, and for this reason it is also known as Academic Painting.
The technique is based on a subsequent layers of paint, each layer having more oil than the previous one.
Priming
The support must first be prepared by applying a ground (gesso) which is then sealed with either diluted varnish or paint. This prevents the following applications of paint to sink into the surface.
THE 4 STAGES OF REALIST PAINTING
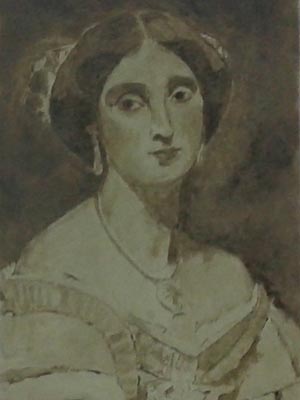
Stage 1: Drawing
The dry brush technique is used. The adjective dry indicates a very thin color. The brush dipped in the color diluted with turpentine (or similar) is partially dried with a cloth before being applied. An earth pigment (raw umber) is used.
The aim is to establish the areas of light and shadow of the subject and their intensity.
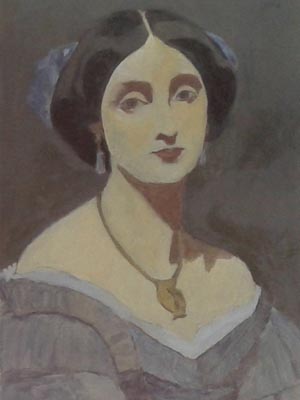
Stage 2: Dead Color
The color is mixed with abundant thinner in order to obtain house paint consistency. This low-oil mixture typically “kills” (deadens) the color (hence the term Dead Color).
The aim here is to establish the basic aspect of the painting by ensuring that the various areas are covered by their predominant color. The painting will have the appearance of a work seen from a great distance, without the possibility of perceiving any detail. Special attention must be paid to the edges between one color and another. If the necessary time is not given to this stage then it will be very difficult to do later corrections and a quality result will not be obtained.
Stage 3: First Painting
The color is applied as it comes out of the tube without being diluted.
The purpose here is to build the shape of the various parts of the subject. It is a stage that requires a lot of time and attention, as shapes and colors must perfectly match those of the subject.
Finishing touches. The work of finishing is done by painting with touches of glazing and crumbling applied so delicately as not to obscure what has already been done but only to make it as perfect as possible. There will therefore be a visible transition from one area of color to another, almost giving the painting the appearance of a mosaic made up of very small pieces. Observed from a distance, the colors will look blended.
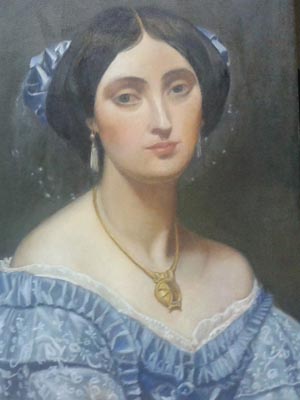
Stage 4: Second Painting
The whole picture is painted all over again! This time, however, the color is diluted. Color should be applied in a thin layer that doesn’t completely obscure what’s underneath. Thus, a transparent layer is created through which the previous stage (the First Painting) can be seen.
The aim is to refine the picture by painting the finest details. The final appearance of the subject will be as it is when viewed from a close distance.
Finishing touches
The work of finishing is done by painting with touches of glazing and crumbling applied so delicately as not to obscure what has already been done but only to make it as perfect as possible.
Final varnishing
The varnish is not always applied, as it makes the painting rather shiny, and this is not appreciated by everyone.
The colors are slightly saturated, and a protective layer is also added to the surface. Varnishing should not be done until the painting has dried completely (6-12 months).
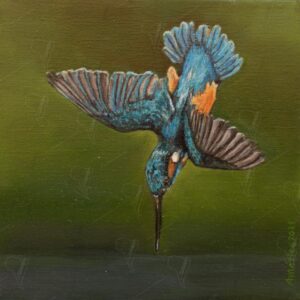
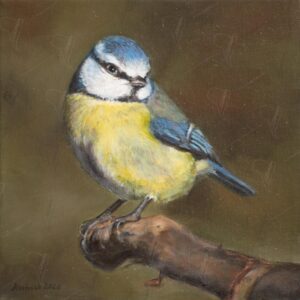
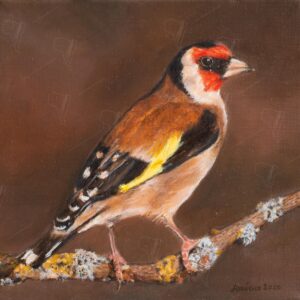
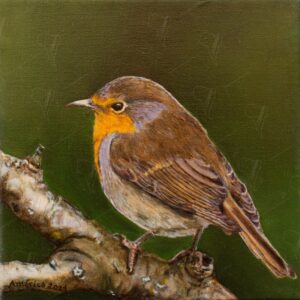
Paintings made with this technique
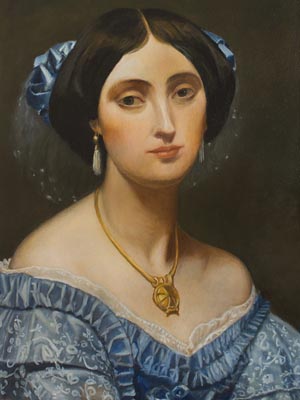
In addition to the painting presented in this tutorial (a reproduction of the Portrait of the Princess de Broglie by J.A.D. Ingres, 1853, detail), here are the other paintings I made using this technique that are visible on this website: